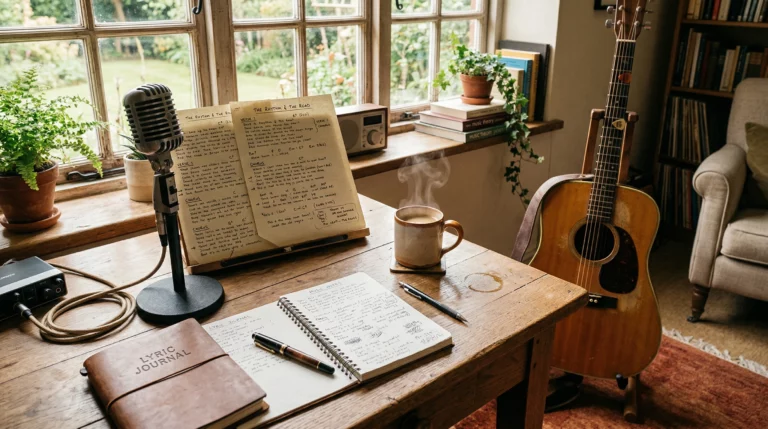
Building your own sound library can totally change up your creative toolkit. For anyone working with audio, whether you’re a music producer, a video editor, a podcaster, or just love experimenting with sound, having a library of unique, high quality sounds is super useful. Over time, you’ll stumble upon how much control it gives you over your projects and how easily you can add character to your work. As someone who’s been there, I’ll break down the basics so you can get started on the right foot with your own customized sound library.
![]()
Why Build Your Own Sound Library?
Using original sounds, instead of the same old samples from commercial packs, gives your projects something special. Building your own collection is pretty rewarding because it can help you create a recognizable style that’s all yours. Original samples come in handy for music genres, sound effects for games, foley work in films, and podcast episodes needing some flair.
Creating a personal sound library is also a huge time saver in the long run. You won’t have to dig through loads of online packs, wondering if what you’re using is truly royalty free. Instead, you’ll know exactly what you’ve got, where it came from, and how it sounds. Plus, it’s great for your workflow; when inspiration hits, your favorite sounds are just a few clicks away. The process of building this library naturally helps you get a feel for audio editing and encourages you to experiment more, ultimately making you more skilled and efficient whatever your project.
Getting Started: Basic Gear and Setup
Starting a sound library from scratch doesn’t mean you need a mountain of expensive gear. Even a simple setup can give you good results if you use it right. Here’s what I find works well for most folks starting out:
- Audio Recorder: This can be a portable recorder, a smartphone with a decent mic, or a USB mic plugged into your computer. Devices like the Zoom H1n or Tascam DR05X are affordable and easy to use.
- Computer with DAW: A digital audio workstation (DAW) like Audacity (free), Reaper, or Ableton Live is your editing playground. You’ll use this to trim, clean up, and organize your sounds.
- Headphones: Good headphones help you focus on details you might miss with computer speakers. Look for closed back models for better sound isolation.
- Storage: Reliable storage is a big deal! Use an external hard drive or cloud storage to back up your recordings. Keeping multiple backups makes sure your hard work is safe.
For those serious about long term use, comfortable headphones can make editing sessions more enjoyable, while a steady computer setup saves time and pain. Even without fancy gear, your approach matters most; understanding your tools and how to use them well is the foundation of a good library.
How to Start Recording Your Own Sounds
Capturing original audio is the fun part. Whether you want to record nature, urban environments, household objects, or musical instruments, the world is full of interesting sounds waiting to be grabbed. Here’s how I like to approach it when I’m out recording:
- Scout Locations: Pay attention to where interesting sounds happen; parks, busy cafes, construction zones, even your kitchen.
- Check Your Gear: Always do a quick check to make sure your batteries are charged and your microphone is working before heading out.
- Reduce Unwanted Noise: Use windshields on microphones outside, and try to record in quieter locations for clean samples.
- Experiment with Angles: Moving the mic closer or farther away can completely change the sound. Try recording from different positions for variety. Even shifting your position in a room can capture subtle echoes or different tonal qualities.
Choosing What to Record
Don’t worry if you’re not sure what sounds to go for at first. My rule is to record anything that grabs your attention. Tap glasses, open doors, walk on gravel, or strum an instrument. Everyday sounds can surprise you with how next level cool they are once recorded and processed. Try recording different objects in the morning and then again at night; temperature and environment can make the same object sound different.
Organizing and Tagging Your Sounds
Once you start building your collection, keeping things organized matters a lot. One thing I learned early is that if you don’t label or tag your sounds well, you’ll waste time searching later. Here’s a simple system that works for me:
- Folder Structure: Create folders based on categories like “Percussion,” “Nature,” “Voices,” or “Transitions.” Add more subfolders as your collection expands, like “Rain” under “Nature.”
- File Naming: Use descriptive names like “metaldoorclang2024.wav” so you immediately know what the sound is without previewing it every time. Dates or location tags can add extra context.
- Tags and Metadata: Some DAWs and file managers let you add tags or notes. Use these for keywords like “rain,” “low pitch,” or “urban.” It’s a lifesaver when you’re searching for something specific, and helps you track down wanted sounds quickly.
Backing Up Your Sound Library
Backups are super important. External hard drives or a reliable cloud service like Google Drive or Dropbox can save your work if your main device fails. Set a regular reminder, weekly or monthly, to sync new files and keep everything safe. Redundancy is key; if one drive fails, your creative work remains secure elsewhere.
Editing and Processing Sounds
Raw recordings are just the starting point. Editing shapes your sounds into usable samples for your projects. I usually work through these steps:
- Trim Silence: Remove any long pauses, accidental bumps, or extra noise from before and after the actual sound.
- Noise Reduction: Tools inside Audacity or your DAW can help remove background hiss or hum without ruining your sample.
- Normalize and EQ: Boost or cut frequencies to shine a light on what’s interesting about the sound (like lowering muddy lows or brightening crisp highs).
- Creative Effects: Reverb, delay, pitch shifting, or heavy distortion can breathe new life into even the simplest noise. Don’t be afraid to go wild and save several versions if you like different results.
Bouncing Sounds for Final Use
Once you’re happy, export your files in high quality formats, like WAV or FLAC for archiving. If you need a lightweight file for quick ideas, MP3 is fine, but keep your original recordings in higher quality for future use. Keeping both high and low quality versions lets you edit and share easily.
Troubleshooting Common Challenges
- Background Noise: Even with the best gear, it sneaks in sometimes. Try noise reduction plugins or simply move to a quieter space. You can also try recording at different times of day for less interference.
- Clipping and Distortion: Watch your recording levels so sounds don’t get too loud. Leave some headroom on your recorder; the loudest peaks shouldn’t hit the very top of your meter. Recording too hot is almost impossible to fix later, so stay on the safe side.
- Organization Overload: If you start drowning in files, stop and reorganize before recording more. Staying on top of organization saves tons of time in the long run. Consider using spreadsheets to log locations and dates if your library grows big enough.
Learning with Each Session
I find jotting down a quick note with each session helps; what worked, what didn’t, and what I want to try next time. These little reminders help you grow your skills quickly. Reviewing your notes from older sessions can spark new ideas and help you avoid repeating past mistakes.
Leveling Up: Advanced Tips for Your Sound Library
Once you’ve got the basics down, there’s always room to expand your library or push your creativity:
Layering: Combine two or more simple sounds to create something brand new. For example, layering a book slam with a thunder sound can beef up impact effects for film. Layering is also great for crafting powerful drum sounds or custom foley for games.
Resampling: Take a sound you recorded and process it again and again, using new effects to create wild variations. Flip, reverse, and pitch sounds to see what new textures you can discover. Sometimes, a sound meant for one thing ends up perfect for a completely different use.
Field Recording Adventures: Take your recorder outside your usual spots. Abandoned factories, late night streets, or forest trails all offer different textures you can’t fake in a studio. Bring a friend and try call and response recordings in echoey places, or capture urban soundscapes during local events for energy you can’t get anywhere else.
Sound Design Challenges: Give yourself limitations, like recording only objects in your bathroom or capturing just metallic sounds for a day. Restrictions can actually help creativity flourish and add fresh perspectives to your sound library.
Where Your Custom Sounds Come in Handy
- Music Production: Use fresh drum samples, background atmospheres, or quirky oneshots in your beats. Your signature sound might come from an oddball object or place you’d never expect.
- Podcasting: Add unique intros, transitions, and sound bites to set your show apart. Make your audience remember your vibe every episode.
- Game Audio: Think about footsteps, inventory clicks, menu whooshes, or enemy growls; all can be original and tailored to your project, boosting immersion for the player. Even simple background ambiances can transform a game’s mood.
- Film and Animation: Bring real world foley or designed hits to life in your projects, setting a mood or surprising your audience with sounds they’ve never heard before.
Real world example: When I worked on a podcast, I recorded sounds in my kitchen to create custom transition effects. It’s a small detail, but it made the show sound much more personalized and lively. It’s the little tweaks that really make things pop.
Frequently Asked Questions
Question: Can I legally use sounds I record in public spots?
Answer: Usually yes, if there’s no private conversation or copyrighted content (like radio music playing) in the background. For commercial projects, it’s smart to check local laws or get permission if you’re on private property. Always be respectful of people’s privacy and local rules. If you’re unsure, doing a quick online search for your city or country’s laws can put your mind at ease.
Question: How do I keep my library from getting out of control?
Answer: Take it slow. Spend some time each week organizing, adding tags, and deleting duplicates. Prepping folders as you go really helps. Breaking organization into small, regular chunks beats doing it all at once later.
Question: What file format should I keep my recordings in?
Answer: For editing or archiving, stick with uncompressed formats like WAV or FLAC. Save compressed files (like MP3) only for sharing or drafts. Strong file management habits will save you lots of trouble in the long run.
Wrapping Up: Your Sound Library, Your Signature
Building your own sound library is a process anyone can tackle, and the effort pays off every time you work on a new project. With a small investment in gear, a bit of curiosity, and a consistent routine, you’ll gradually build a collection that reflects your style and needs. Grab your mic, start recording, and enjoy the ride. Your future self will thank you for every unique sound you capture. Sound libraries are never truly finished; they grow and change with you, becoming a signature part of your creative journey.